Friday 18 May 2007

Event Tables #2: A Table With Multiple Rows

This post follows on from a previous post about Event Table and Iteration modules. Towards the end of that post, I was imagining using an event table with several rows of data; using Row 0 (the first row) to control some parameter of my instrument, using Row 1 (second row) to control another parameter, Row 2 (third row) to control a third parameter...

And someone on the Reaktor forum called my bluff and asked me to show how to do that. This week, I suddenly thought of how I might do it, so this post is an attempt to implement that technique:

Watch the video

I'm not actually making any noises this time (the last episode got a bit spooky, so I'm giving the atmospheric sonics a rest), I thought I'd test my theory with an ultra-simple instrument that simply sends the event table's outputs to a number of numeric readout panel controls. I actually found this simplification really useful: it meant I was able to see the results of my work as numbers, rather than having to interpret the numbers' effects on a sound. The video might also be useful to anyone looking to start processing and controlling events with iteration, value and order modules.
Note: I've been testing Azureus Vuze as a platform for my videos and I've discovered that I don't like it very much. This time, I'm testing a website called Sclipo, which has ropier sound but gives you a handy full-screen feature (right-hand side of the video control panel), looks more like Youtube than Azureus does, and where you can also learn how to play "Roses" by Outkast on piano or electronic keyboard. Sweet mother of the baby Jesus.

Saturday 28 April 2007

Grain Resynth Module

A nice, simple post this time.

Watch the video

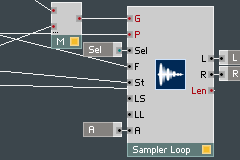
A couple of posts ago I was playing with an instrument, built around a Sample Loop module, which would randomly jump from place to place within a sample as the sample played. A Reaktor builder called Don Dailey (tubaman on NI's R5 forum) turned it into another instrument, called EOS (you can see it in the R5 user library - thanks for the work Don, really good stuff!). There was a bit of discussion about it, and Don wrote in one of his posts that the instrument works better with samples that have a lot of variation in harmonics or sound texture - so that, when the instrument jumps from place to place in the sound, your hear an audible change in the output. I thought, why not investigate quick ways to generate that kind of sound, and so decided to throw some recordings I've got into a Sample Resynth module.

I found that, with the right sample file, you can very quickly achieve some great atmospheres without a lot of building. One of the sounds I use in the video is a recording of Indian temple bells, which I made last year in Darjeeling. I've uploaded it to The Freesound Project in case you want to play (it might take a while to get through moderation).

Oh, and I'm experimenting with Azureus Vuze as a media host, so let me know how you get on with that; and I'm also spending less time editing the content down, so it's a bit slower in pace than previous entries. Again, drop me a line and let me know what you think. Hope you find it useful...

Monday 16 April 2007

Event Table & Iteration Modules

Event table and Iteration modules: Playing with an event module; using Reaktor's Iteration module to program it.

Watch the video

I've been using event tables in a simple way for a while: filling them with random numbers, and repeatedly playing sets of those numbers within pattern sequencers.

But I've been struggling when trying to build a multi-row table, because I don't know how to make Native Table Files - data files in which Reaktor stores event table information, which can contain any number of rows. All I've been able to do so far is to import text files, which can only contain one row of data. So I decided to build an instrument which let me:
  • Import a (single-row) text file into an event table
  • Write that information into a second, multi-row event table, in a specific row
  • Repeat until the multi-row event table is full
Then, I can save the multi-row data as a genuine Native Table File.

I decided to use an Iteration module, featured in the second half of the video, to whip along a row of data, reading a cell from my "import" event table, and write it into my multi-row, "target" event table. While I was working, I started to realise what the Iteration module might be useful for in the future, so I thought it was well worth a diary entry.

Monday 2 April 2007

Glitch Sampler Part 12


Making a glitchy pad sample instrument, part 12: refining event processing using separator & value modules

Watch the video

Notes
  • This instrument is turning into quite a neat, small-scale example of using value, separator and merge modules for processing events... I've seen these modules used a lot in advanced ensembles; they're obviously very, very useful.

Glitch Sampler Part 11


Making a glitchy pad sample instrument, part 11: Improving my event processing - merging, not adding

Watch the video

Notes
  • This episode is about refining a hacked-together feature, so that my instrument will be more useable in future (in this case, with a wider range of sample maps).
  • (1:53) There is a tiny probability of a random value of exactly zero, but I think it'll be a "win-the-lottery" kind of chance.

Glitch Sampler Part 10


Making a glitchy pad sample instrument, part 10: getting rid of event loop warnings

Watch the video

Notes
  • I've come back to the instrument after a rest, to resolve a couple of issues with the design.
  • In this episode, I'm enabling event loops for my instrument, because Reaktor keeps popping up event loop warnings, but I think I'm doing nothing particularly dangerous - in fact I think Reaktor might be detecting a loop that isn't really there. It's also possible to enable event loops at macro level; so a more precise approach would be to encapsulate my random number generator and my sample loop module in a single macro, and enable event loops only for that macro.
  • If you do have a potentially dangerous event loop in your structure, another method of making it less harmful is to introduce a delay (either with a single delay or a unit delay module) into the loop. From what I've read, this should mean that the loop can't generate events at a frequency that will crash Reaktor.
  • Just for fun, I went away and built an ensemble with a real, deadly event loop and this one crashes Reaktor instantaneously: it just disappears in a flash, no warnings or anything. So... never do this:


Saturday 31 March 2007

Glitch Sampler Part 9


Making a glitchy pad sample instrument, part 9: filter, effects and having a play

Watch the video

Notes
  • (1:35) The samples in this sample map don't have a huge amount of top end, so opening the filter up doesn't produce a huge burst of high harmonics. But use a brighter set of samples and this could change completely.
  • (3:00) This is all down to the resonance of the filter boosting a narrow band of frequencies in the sample. If your filter cutoff is at a frequency where the sample is very loud (for instance if the sample has been EQ'd to boost the mid-range somewhere), the resonance will boost these loud frequencies up even higher and you can get problems with levels. Depends on the quality and content of your samples.

Glitch Sampler Part 8

Making a glitchy pad sample instrument, part 8: frequency modulation and the sampler loop module

Watch the video

Notes

  • (2:00) Did something very, very similar to this in the previous FM Synth diary.
  • (3:03) Now then, this sounds rude. Good for a techno drop & build I'd imagine.

Glitch Sampler Part 7

Making a glitchy pad sample instrument, part 7: refining the instrument layout

Watch the video

Notes

  • OK, we're through the most panicked phase of the build now ;)
  • It's always a nice moment when the layout of your instrument settles down. I love generating components that feel re-useable.
  • (2:30) So however many voices you set up for the instrument, those voices are summed together by the audio voice combiners, then the volume mixer turns down the volume of the mix.

Glitch Sampler Part 6

Making a glitchy pad sample instrument, part 6: using the separator module

Watch the video

Notes

  • This isn't the first time I've found the separator module amazingly useful. I think it's worthwhile taking a bit of time to get to know little modules like this, because they're amazingly handy. The more I use Reaktor, the more I get into all the routing and event logic.
  • While this is a useful example of how to use a separator module, it's used in the context of a solution which I don't think is very elegant. Later in this sequence of videos I'll come back and improve the design of this part of the structure.

Glitch Sampler Part 5


Making a glitchy pad sample instrument, part 5: hacking a way round an event loop... and more problems

Watch the video

Notes

  • (0:31) This isn't a meaningful, logical approach to the problem, it's just a hack which happens to work in this instance. Later in the sequence I'll investigate further, because I'm not sure that this is even a genuine event loop... need to do some reading.
  • (1:50) The sampler's being re-triggered purely by the Geiger module now, the MIDI Gate has nothing to do with it.
  • (2:32) Ah, more ad hoc problem solving. If anyone's got any more elegant solutions to this problem, let me know.

Glitch Sampler Part 4


Making a glitchy pad sample instrument, part 4: event loop and envelope macro

Watch the video

Notes

  • (0:43) Maybe my right-brain will come up with a solution to the event loop problem while I'm taking control of the volume.
  • (1:14) I know Reaktor comes with lots of helpful macros, including envelopes, but I like ridiculously fast envelopes and a particular "feel" to my controls, so I've started to write my own.

Glitch Sampler Part 3


Making a glitchy pad sample instrument, part 3: Geiger module

Watch the video

Notes

  • (0:49) Oh, hang on. If you pause the video here, you'll see the pop-up which says that if the value of the gate signal is between 0 and 1, then that's mapped to the velocity range 0 ... 127 in the Map Editor. What this means is that, if you've got different samples layered to trigger at different velocities (loud drum samples and quiet drum samples), the value of the G input is very important to you indeed. When I say I'm not worried what that value is, that's because my sample map is very simple (never more than one sample per note)
  • (2:05) Event and audio signals are very different things, so it's not surprising that the Geiger's two outputs behave differently... it's just that I'm not sure I've ever been able to get the Geiger event output doing anything meaningful...
  • (2:59) Yawn... I'm not bored. This was recorded late at night.

Glitch Sampler Part 2


Making a glitchy pad sample instrument, part 2: sampler loop module: triggering the sample at a random point in the loop

Watch the video

Notes

  • (0:36) Here's the macro if you want to have a play with it. Incidentally, I'm not 100% happy with the design - it works, but it's not elegant, and usually when I put it into an instrument I tweak the design for efficiency or to work with the rest of the instrument. If you have any thoughts about how to improve it, let me know.
  • (1:27) This step introduces an event loop into the instrument design, which is a bug; and at the moment I don't know how to fix this kind of problem properly. I'm sure I'll do some research into it over the following months but if anyone knows any resources on event loops, or has any ideas, I'd love to hear them.
  • (2:10) "Looping back to the beginning"... when you import samples into the sample map of a sample module, if you want the sample to loop at all, you need to highlight the relevant sample and click the Loop button in the sample map window. The first time I built a sampler I spent about an hour trying to wire the module's inputs this way and that, before I realised that the sample map window seems to default to no looping for imported samples.

Glitch Sampler Part 1


Making a glitching pad instrument, part 1: sampler loop module

Watch the video

Notes

  • This instrument uses a map of pad samples - the sound of the instrument would be radically different if different samples were used.
  • (2:55) This is another example of a Reaktor module not behaving because it's missing a required input.

Wednesday 21 February 2007

FM Part 6


Making a simple FM synth, part 6: Adding envelopes to the carrier and the modulator.

Watch the video


Notes
  • Obviously envelopes make a massive difference to the sound.
  • (0:55) Some of Reaktor's envelopes, like the ADSR, have a G input which triggers the envelope with an amplitude proportional to the size of the gate signal: if you send the number 0.1 into the G input, the envelope will trigger quietly; if you send the number 1.0, it'll trigger more loudly. Other envelopes have a Trig input which works differently: any gate signal, no matter how large, just opens the envelope at full amplitude - or, as in the example of the D envelope used later in the video, at the amplitude passed to the envelope module's A input.
  • ...Well, it's not a DX7 yet, but it makes a nice techno bass sound. I'll stash it somewhere to develop later...

FM Part 5


Making a simple FM synth, part 5: Making a panel control to control the modulator's amplitude (FM Amount).

Watch the video

Notes
  • Now we've got control over the amount of FM and the interval between the carrier and the modulator, suddenly we can make all sorts of changes to the tone of the synth.
  • (0:25) I often find it really useful to start an instrument with constants controlling various aspects of the sound, because they let you get a feel for the range of values that'll work for the synth.

FM Part 4


Making a simple FM synth, part 4: Making a panel control to control the modulator's pitch relative to the pitch of the carrier.

Watch the video

Notes
  • I'm doing a lot of Show Hints in this video: the little cursor & "i" button in the structure toolbar is active, which means that when I mouseover a wire or a module, I'll see pop-ups showing info about the module or the signal in the wire. Very, very handy.
  • (1:02) I always like to pay a bit of attention to the step size and mouse resolution of my panel controls, because you can control how smoothly they respond, and the level of detail they give you.
  • (1:56) I'm setting all my modules to mono here - which is what the orange square means in the bottom-right corner of each module. A polyphonic module has a yellow square. I like mono.
  • (2:00, using the Add module) It might be worth replaying this bit: it's little things like this... using Add modules to mix signals, and doing maths in general to your sounds... that make Reaktor so powerful.
  • (3:05) ...Or a bit like pulse-width modulation.
  • (3:23) 5 semi-tones, or MIDI notes, is the musical interval of a 4th (C to F or A to D). A 5th (C to G or A to E) is 7 semi-tones or MIDI notes. It feels like when the modulator's 12 or 24 or 36 notes up from the carrier, you get the most musical FM harmonics. Musical intervals give musical harmonics.
  • (5:36) Here, I'm turning up the FM amount, not changing the interval between the modulator and the carrier. More FM means louder harmonics, and changing the interval changes the sequence of harmonics produced.

FM Part 3


Making a simple FM synth, part 3: Playing with frequencies

Watch the video


Notes
  • (2:30) MINUS frequencies??? This makes sense... at NAMM this year, the Technicians of the Museum of Techno spoke to Cynthia Webster of Cyndustries.com, who makes an analog FM oscillator called the Zeroscillator. She's very proud that the oscillator is "through-zero", so if you tell it to play a negative frequency, it'll cycle through its waveform in reverse direction. I'm going to get a Reaktor oscilloscope going, I think, to investigate this... I'd like to see what it looks like.
  • Watch the modulator's A input value going up and down... it feels like larger values, more frequency modulation, make for brighter sounds.

FM Part 2


Making a simple FM synth, part 2: adding a second oscillator (operator in FM-speak) to drive the frequency of the carrier up and down.

This video shows the impact of frequency modulation on the carrier's timbre (tone).

Watch the video

Notes
  • (0:20) In subtractive synths, and in Reaktor, tone-generating modules are often called oscillators. In FM, they're called operators. A carrier operator is an operator whose output you listen to... a modulator operator is an operator used primarily to modulate the frequency of a carrier.
  • (0:58) The modulator's A input defines its amplitude - how loud it is. normally, you'd expect an oscillator's amplitude to be somewhere in the range 0 ... 1. But we want to generate a signal to drive the carrier's frequency up and down, and we're going to be using some big numbers (in the hundreds and thousands), so I'll be using quite large values for the modulator's amplitude...
  • (1.22) "65 times every second:" MIDI note 36 is the pitch of my low C note; the 36th key on the longest possible MIDI keyboard. That corresponds to an oscillator's waveform cycling... or a piano string vibrating... at 65.4Hz (65.4 cycles per second, its frequency). Any number passed to an oscillator's F input will be added to its frequency. What we're doing here is adding the modulator's output, scaled up by some amount, to the carrier's frequency.

FM Part 1


Making a simple FM synth, part 1: getting a sound out of Reaktor, and instruments in a Reaktor ensemble.

Watch the video

Notes
  • I've chosen quite a low note to play with so you might need to put your headphones on if your PC speakers don't go all the way down!
  • (1:50) I hope this all makes sense. One of the early challenges when you're learning Reaktor is getting it to make a sound at all... I'm hoping to get round that by starting really simply (just the one oscillator). Basically, if you've got a very simple structure that isn't sounding, and you think it should be, check that you've got all your inputs wired up.

Reaktor Diary: Intro

Over the past year I've been learning to build instruments and ensembles with Native Instruments' Reaktor 5. I love it - it's beautifully designed, it sounds amazing, and there are all sorts of instruments to download from the NI user library.

At the same time, I haven't found many books or deep online tutorials about Reaktor, beyond simple stuff like constructing a basic subtractive synth. That seems a bit of a shame, because R5's such a good way to explore synth design and electronic sound.

So I started exploring R5 while using it in my own tracks. And I thought I might try to share some of what I've discovered, in case it has any value for other people. So I've started this video diary. It's going to be a little bit freeform, and I'm no grand master, but I suppose it still might be useful to people who are getting to grips with what Reaktor can do.

I hope you enjoy it, and feel free to drop me a line with your feedback. Thanks!

Dave